
The Weekend Warrior takes a break
.
With this room remodel, we decided to try something completely new for us – we’re putting in tin ceiling tiles. I have to admit, I’m somewhat concerned about the noise factor, but I am hoping that since the tiles will be mounted directly on top of the wood that is already there, some of the noise will be dampened.
I went online and found some really pretty ceiling tiles from a company called American Tin Ceilings (they have a website, but have asked that I not link to them in my posts). The neat thing about these tiles is that you can order them pre-finished with a powder coating in the color of your choice for just a little bit more than plain metal tiles.

Pattern #2 – American Tin Ceiling’s most popular pattern (color shown is Ivory; we went with Creamy White Satin)
Installing a tin tile ceiling meant less work for Paul in the long run – no unwieldy panels of sheet rock to screw up, no taping and bedding, and no painting over his head. And best of all, if there is ever a water leak – which we don’t anticipate in that room – we won’t need to worry about a messy patch-up job (*cough**Dining Room**cough**Kitchen**cough*).
On a project like this, prep work is very important. We drew up a layout of the surface of the ceiling and mapped out where the tiles should go. There were a couple of different ways that we could have configured it; our only limitation was the number of tiles we had ordered for the project.

Yes, we’re geeks…..
Next, Paul measured out where the seams of the tiles needed to be and snapped chalk lines on the ceiling for guidance.
Now, what Paul liked about this project is that it meant he got to purchase yet another toy power tool; the tiles are mounted using brads, and a brad nailer makes the job ever so much easier….
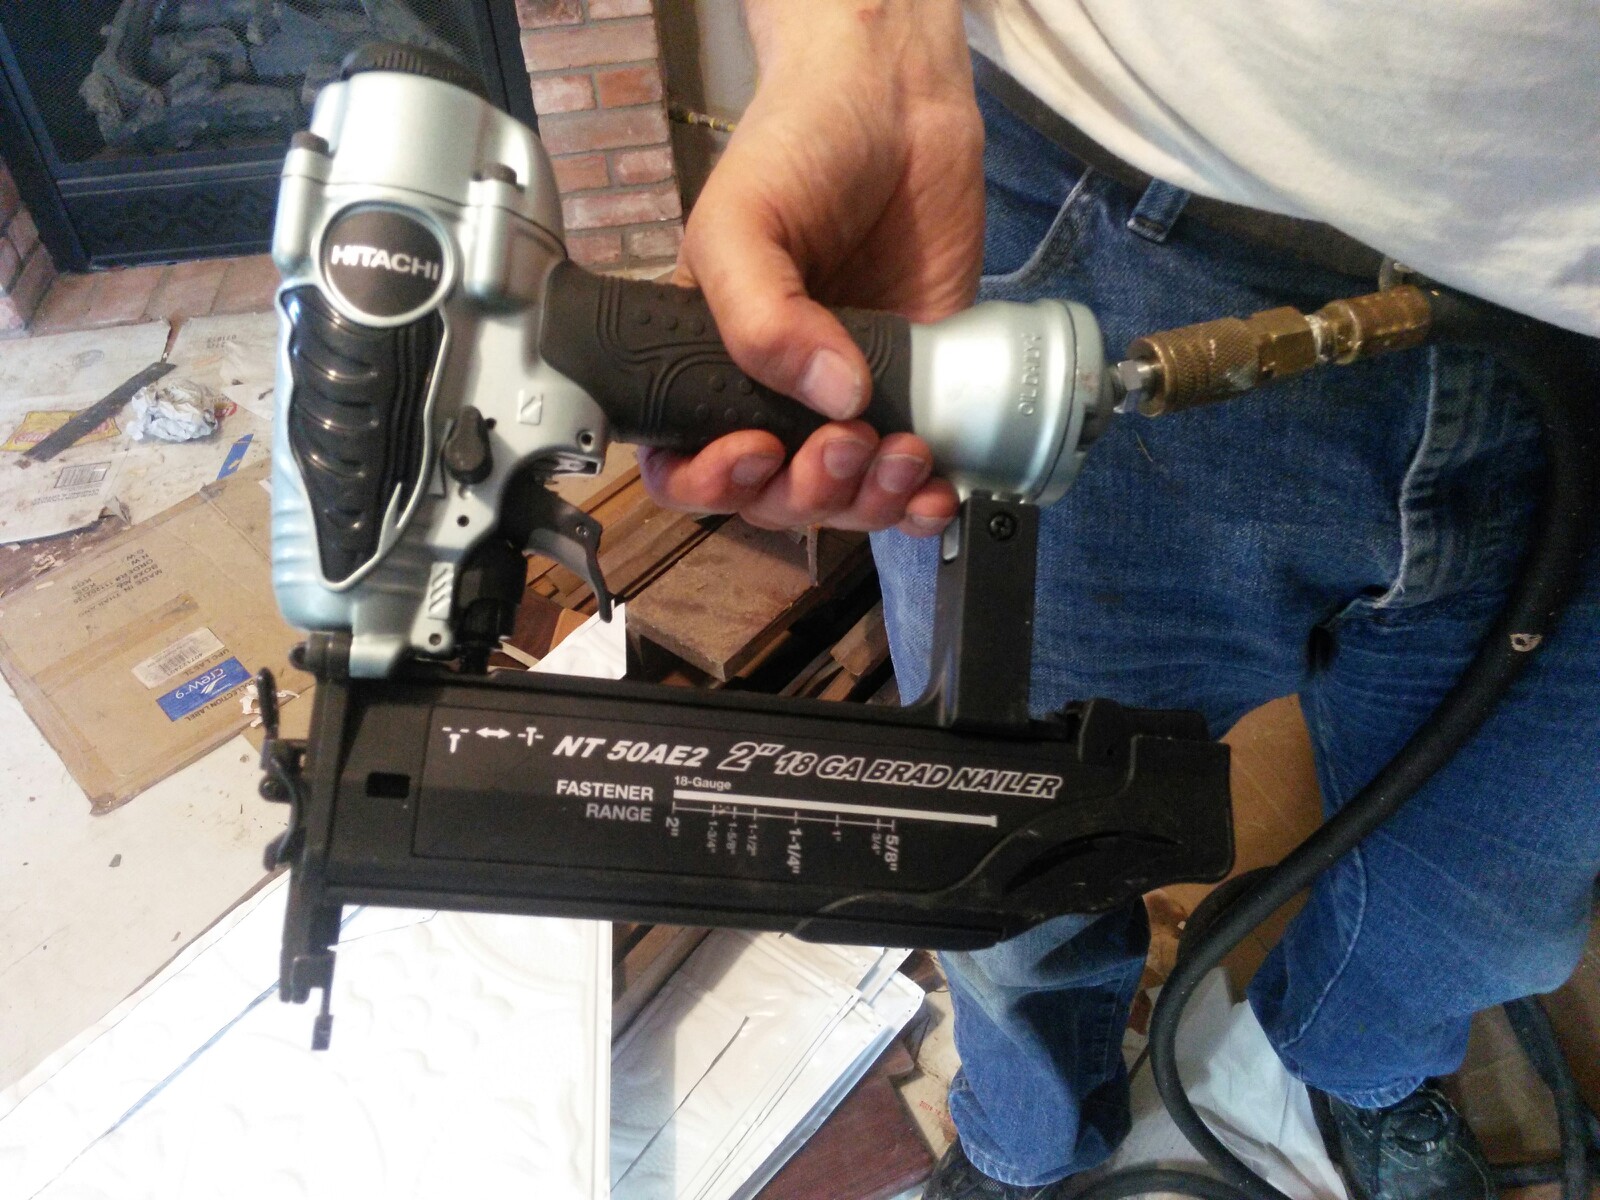
The newest tool in Paul’s arsenal….
.
Speaking of making the job easier, the ceiling tile company also sells a Guillotine-style cutter that is large enough to accommodate their tiles. The week before we were scheduled to start installing tiles, I surprised Paul and went ahead and ordered one for him – it arrived just in time for much fun to be had….
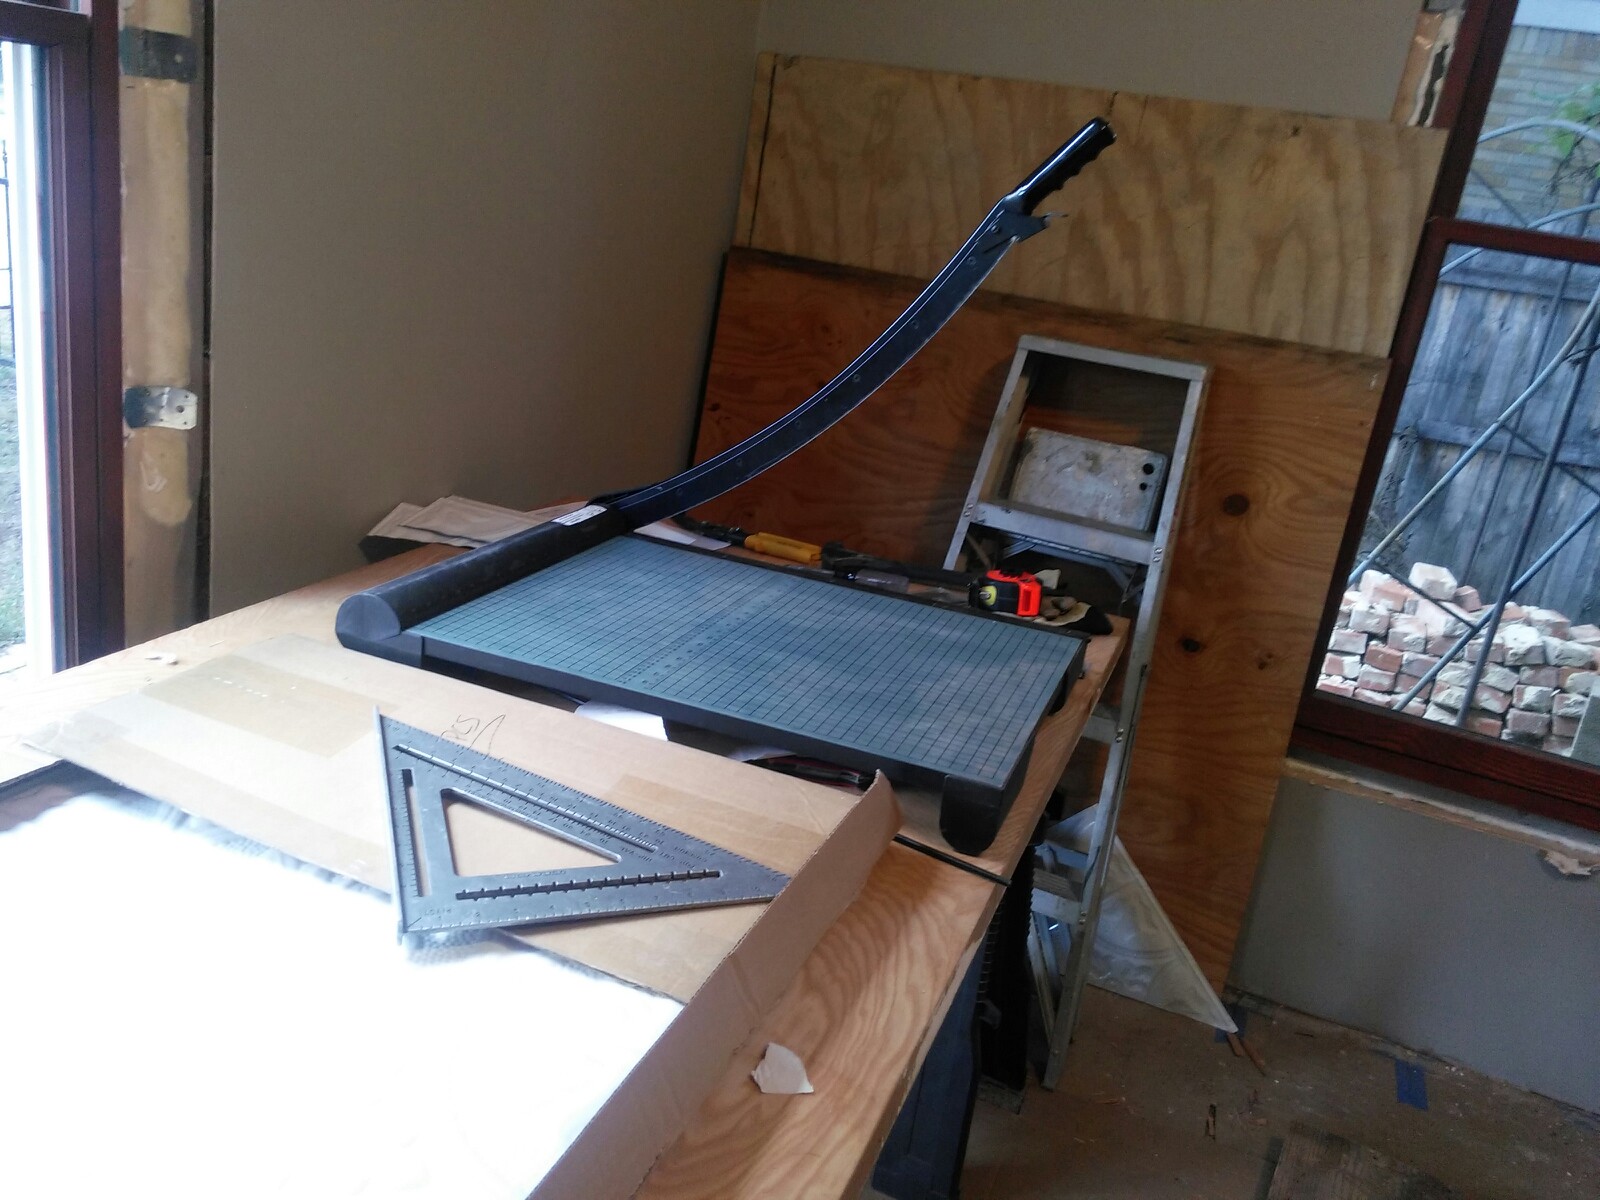
This puppy is the real deal – it measures 18″x24″
….and then life got in the way. The day before we were supposed to start, Sarah wrecked Paul’s truck, so he had to take time out from working on the house to get her a working vehicle.

Thankfully, Sarah was fine – all of the damage was to the body of the truck!
The project got pushed back one week….then another…..then another….
Then we went to visit Paul’s mother for Mother’s Day….

Mother’s Day, 2014 – Paul and his Mom
.
Then Paul paid our friend Leon back for letting us store the truck in his shop while he was making repairs by helping him run wires in his new workshop…
….and finally – two months later – the real fun was ready to begin!
Our friend Gary came over today, and over the course of the day, a new tin ceiling was installed.

“Okay, let’s line it up, you hold it in place, and I’ll nail it”
.
There were a few false starts, but once those first few tiles were in the right place, things went pretty quickly. Most of the tiles required little alteration, so the entire job was fairly easy.

The last one…..
.
The whole room was done before dinner, so Paul was able to relax for the rest of the evening – a real rarity on most of our home improvement projects! Now all that’s left to do on the ceiling is to put up crown molding and a ceiling fan.
We might get those tasks done by the time Rebecca starts back to school in the fall….
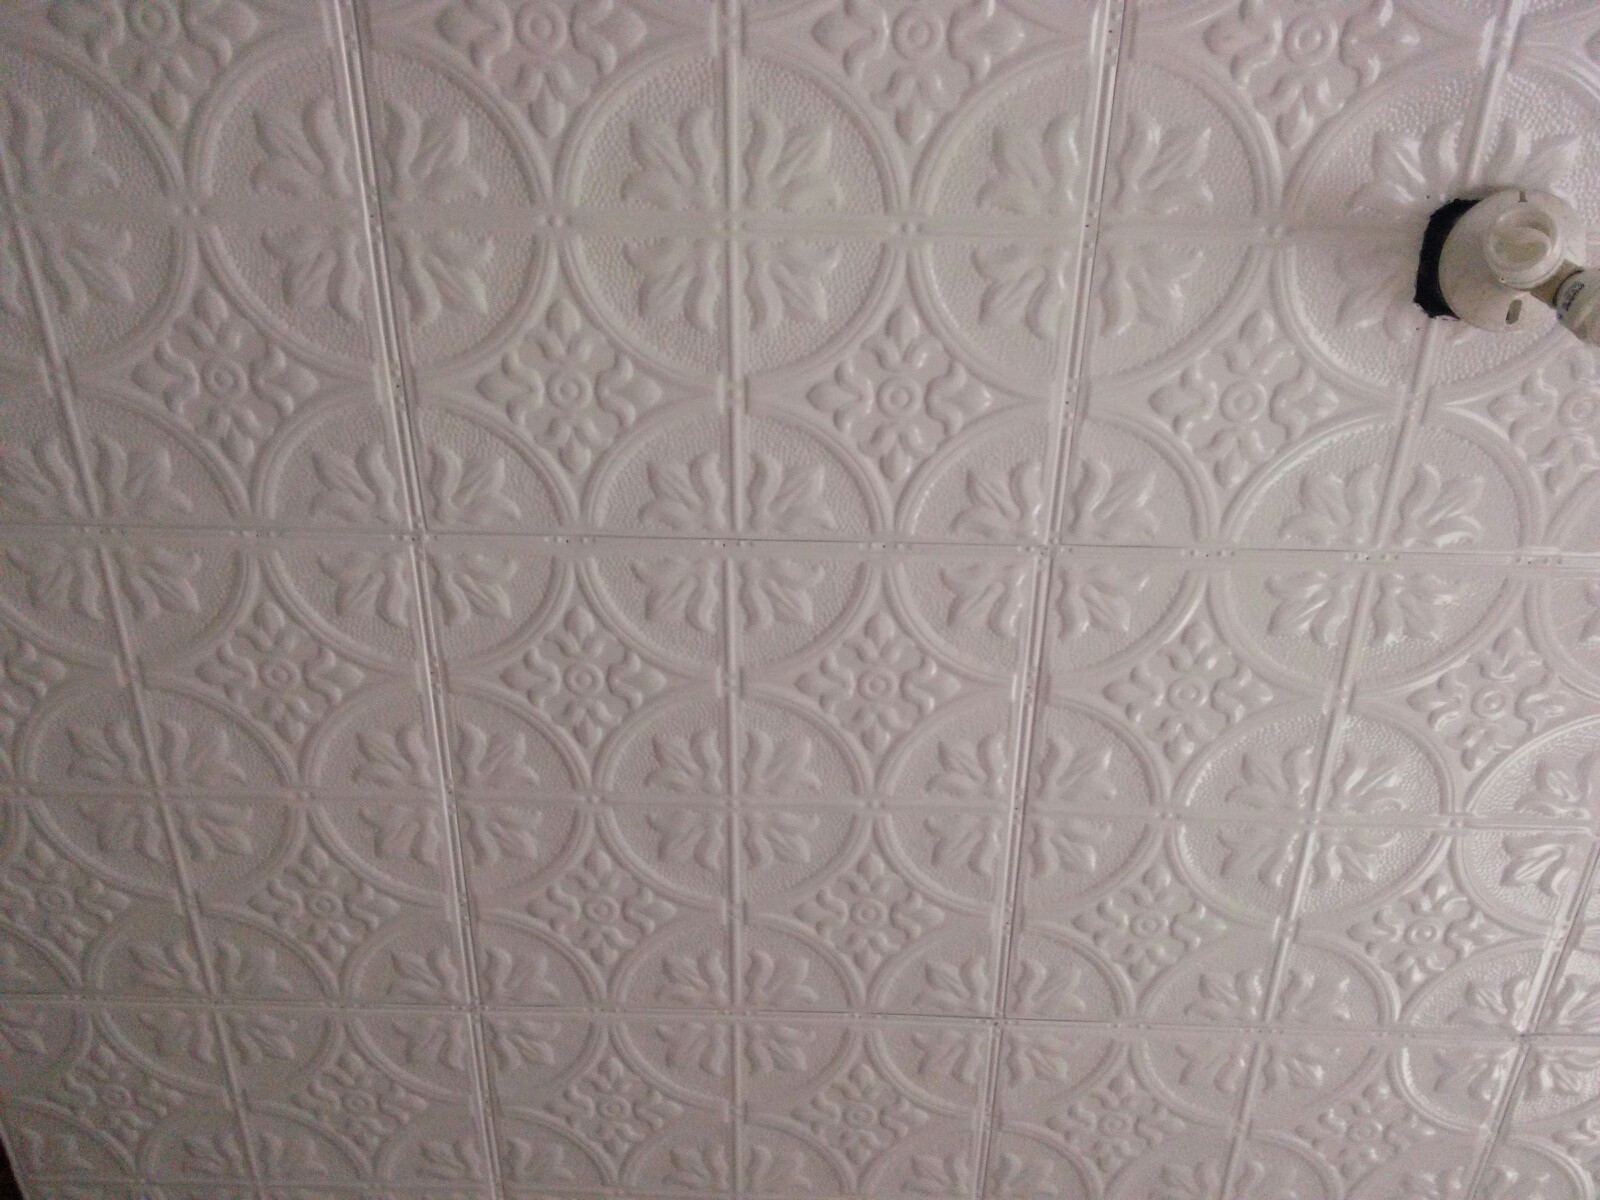
Much easier than sheet rock – and prettier, too!
.


My sister has these in her hallway and there has been no noticeable change in noise level. She went with copper and it is very pretty.
LikeLike
Thanks, sweetie – good to know! These are installed over solid wood, so I have a feeling it might dampen most of the noise. I had resisted using them in other rooms in the house, but I think we’ll be using them in other rooms from now on 🙂
LikeLike